Relabel Mode allows item labels to be reproduced without affecting inventory on those items.
Situations where you'd want to relabel an item might include:
- An item's current price sticker is out of date and doesn't reflect the current item price
- An item's price sticker has come off
- An item's current price sticker has become unscannable
- The sticker originally printed for an item was misplaced or accidentally thrown away
- A customer has decided not to pick up a specially-ordered item for which a customer order label has been produced, and a new shelf label is needed.
To relabel an item, simply click the "Enter Relabel Mode" button (CTRL + L)

You will be taken to a screen that looks like this:

Before you scan an item to be relabeled you should take a look at the options at the top of the screen.

The "New" and "Used" condition buttons determine how an item is labeled (if your locations do not carry Used items, these choices will not be shown as the system defaults to New on all items.) Even if an item is used, if you have the "New" button selected the new sticker will display a new condition price if you scan the item's barcode instead of a store price label. Be sure not to scan used items as new and vice-versa, as this can result in items appearing to be priced incorrectly, or lead to inventory discrepancies if the mislabeled item is sold. If you scan an item's existing price label, the "New" and "Used" button will automatically select the condition contained in the sticker's barcode.
The "Print Labels" box should always be checked, since you are relabeling.
The "Allow Transfer" box should usually be left un-checked. This will give the item the option to be transferred to another store should the system determine that it has a greater chance of being sold at another location, if your location supports store-to-store transfers. Your supervisors will be able to let you know if you should leave the box checked or not. If your locations are not set up to allow automated transfers of items, this can remain checked or unchecked and nothing different will occur while relabeling.
Once you have determined which options to select, you can scan the item in as you would for any other operation. It will then appear on the screen much as it would appear on a transaction screen. You may relabel as many items at a time as you'd like. You can also scan in items of different conditions in the same operation by clicking on the "New" or "Used" buttons at any time during the relabeling process. You can tell what condition an item scanned in by looking at the "Reprice" heading next to the item image. It will say "RepriceNew" or "RepriceUsed" depending on the condition scanned. Note that selected conditions and Allow Transfer/Print Labels options stay selected until changed, and only take effect on items which are scanned after selection (in other words, if you have scanned items into the screen under one group of options and then change those options, the already-scanned items will remain scanned in with the previous options). Once you have scanned all the items that need to be relabeled, you can click the "Relabel xx Items" button or simply press the + button.
Labels typically print out in lots of 30 (this number is based on the standard number of labels on a single label sheet). The printer will not print labels until there are 30 labels in the print queue. You can view how many labels are in the print queue by looking at the "x/30" number above the "Print Labels" check box. In the below case, there are 24 items in the label queue, and 3 that have been scanned in and are awaiting completion, so three more labels will need to be created after they are processed in order to produce a full sheet of labels. Printers such as Zebra printers will produce labels one-at-a-time, on demand; thus their label queue will only consist of one item rather than 30 and labels can be printed in any quantity.

So, depending on the settings (refer to the details below), labels are printed automatically as items are relabeled. As described above, both 'new' and 'used' items can be relabeled, here you can see the differences in printed labels:
- Relabel a new item with label

- Relabel a used item with label

What if you're trying to clear off a counter of items waiting to be relabeled before your store closes, but you don't have enough items to fill an entire label queue? There is a "Label Printer" button at the very bottom right of the application window. Click it and select "Empty Print Queue()" to force the label sheet to print without containing 30 printed labels. Note that the "Empty Print Queue()" option will indicate the number of pending labels in the parenthesis, in order to give a quick hint about how many labels will be printed on the label sheet.
Settings for Relabel Mode
Company settings

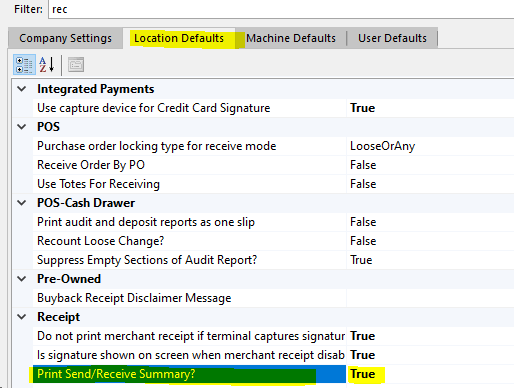
Locations settings

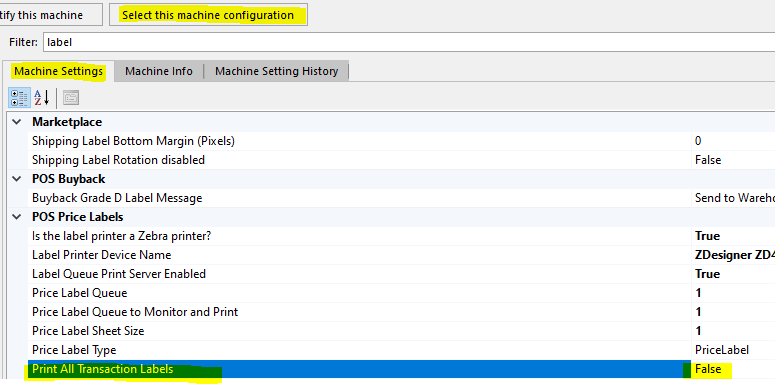
Machine Settings


Click here to test your skills!
Was this article helpful?
That’s Great!
Thank you for your feedback
Sorry! We couldn't be helpful
Thank you for your feedback
Feedback sent
We appreciate your effort and will try to fix the article