 The Add menu is inside the WYSIWYG Form, which lives within the Item Edit screen under the Web Details tab. To navigate to the WYSIWYG form and read more about it, visit this article first.
The Add menu looks like a + and allows the user to add up to six kinds of items to your description: Media, Image, Link, Special Character, Horizontal Line, or Date/time. We will go over each one in detail.
Let's get started with the six options from the + menu.
Image Option
The Image option is straightforward, and you will find it easy to use to upload an image from the Image Cloud or your online source. Any image you choose to upload through the Image Cloud Upload Form must be in one of the following formats:
- JPG, GIF, BMP, or PNG
From the Image window, you can insert an image in the following ways:
- Paste the source code to an image you have found online, ending in one of the acceptable filename extensions (see above).
- Click the Image Cloud Upload Form button and select an image already available in the Image Cloud.
- Click the Image Cloud Upload Form button and upload an image from your computer.
You can also constrain proportions and change the dimensions of your image. A warning: never try to make the image larger than its original dimensions. It will blow out the quality of the image and look pixelated on the page. Be careful what images you choose to use. It is possible that the image is not available for commercial use, and you could be violating copyright law by adding it to a product page.
- Do not use copyrighted material that is not available to be used commercially.

This is the icon that allows access to the Image Cloud Upload Form.
Link Option
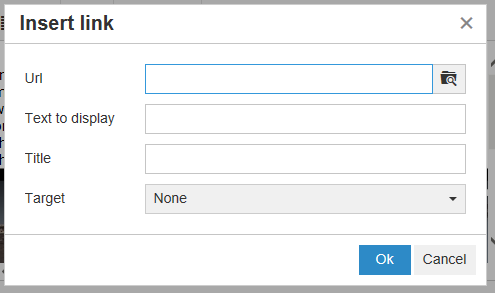
The Link option offers a few different controls for the link you'd like to insert into the product page. Simply find the URL you'd like to use, and paste it inside the URL box.
- The default text will display the link itself, but you can change this to something more appealing in the Text to Display box.
- The Target field will allow you to define whether or not you want the link to open in a new window.
The Link window looks like this:
Horizontal Line Option
This inserts a horizontal line into the product description box. You can use it to stylistically separate different parts of a long product description.
Date/time Option
This options allows you to choose one of four ways you would like to insert the date and time. You simply click the one you'd like and it puts it into the product description for you.
The different date/time formats it offers are as follows:
- 16:23:39
- 2017-08-14
- 4:23:39 PM
- 08/14/2017
Special Character Option
This menu simply offers you a number of special characters you may want to include in a product description.
- Important: If you click this option, you must click a special character to exit the menu, even if you don't want to use one. You can simply backspace the character if you accidentally insert one.
Here is the special character chart with its options:

Media Option
The Media option in this menu will allow you to upload sound or video, such as a sample track to an album or a commercial video or film trailer. You can do this by using one of three tabs within the Insert/edit media screen.. Each tab, General, Embed, and Advanced, has different ways to insert media into the page. They are all connected and reference one another in certain circumstances.
General Tab
- The General tab is where you can add a link to an mp3 or a video file to the product description. This can be done with a link that ends in the file type, i.e. .mp3, .mpg, etc. A link like a YouTube link will not work in the General tab.
- You can also constrain the proportions for your music player or your video file. Changing the Dimensions in the General tab will affect any embed or upload that is inserted through the Insert Media window.
Embed Tab
- This tab is where you can paste any embed code from a site like YouTube. You will go to the other site to get your embed code that you can paste inside the Insert Media window. When you paste it, it will add a link to the Advanced tab and dimensions to the General tab.
- This must be formatted in HTML embed structure.
- Be careful what media you choose to use. It is possible that the media is not available for commercial use, and you could be violating copyright law by adding it to a product page.
- Do not use copyrighted material that is not available to be used commercially.
Advanced Tab
- The Alternative Source field under the Advanced tab will auto-fill when a media item is loaded into the General tab.
- You can also click the Image Cloud Upload Form button and grab an alternative media source already on the Image Cloud.
Was this article helpful?
That’s Great!
Thank you for your feedback
Sorry! We couldn't be helpful
Thank you for your feedback
Feedback sent
We appreciate your effort and will try to fix the article